IntroductionThis section describes a step-by-step guide to producing a 3-link chain coupling from scratch.
It is assumed that the 3D modelling package used is Autodesk® 3ds Max® and the package used for authoring textures is Adobe® Photoshop.
The modelling package Autodesk® 3ds Max® was used to create Train Simulator, so this product appears in the examples provided. You can, of course, use other packages such as Blender™ or amabilis 3D Crafter. The package used here for authoring textures is Adobe® Photoshop. Again, you may use one of the many other packages available.
Regardless of the packages you use, the documents below should be used as a general guide to the processes to follow to build assets for Train Simulator.
| Important Note: For your chosen package, you may need additional plug-ins to export the assets into Train Simulator. Please check the availability of a suitable plug-in before you begin creating assets. |
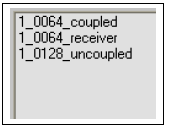
The 3 object states of couplingsThis section will run through the process of creating the 3-link chain coupling. Create the 3 object states- Couplers consist of 3 objects, coupled, uncoupled and receiving.
- The coupled state is an object that reflects a coupling when 2 wagons or engines are connected.
- The uncoupled state is an object that reflects a coupling that is not connected to another wagon or engine.
- The receiving state is the point where the coupling attaches to the target wagon or engine.
- All 3 object pivot points should be positioned where the coupler meets the parent wagon or engine.
- All 3 objects should then be positioned at 0,0,0 within 3ds Max.
- Each object needs naming correctly for the code to work correctly
- Export each object state individually.
- These are then referenced in a coupling blueprint and then subsequently referenced in the wagon or engine blueprint.
Other coupling types- For coupling types that don't use a receiving point, such as the Buckeye only coupled and uncoupled objects are required.
|
|